| Healing Kadara's Heart Walkthrough | |
|---|---|
| |
| Type | Heleus assignments |
| Starting Location | Kadara |
| Mission Location | Kadara |
| Start | approach a monolith |
Healing Kadara's Heart is a heleus assignments mission.
Description[ | ]
Kadara needs clean drinking water—streams and lakes are toxic and filled with sulfuric acid. Remnant technology could transform Kadara's water supply, but the monoliths around the planet must be activated to begin the process.
After you activated three monoliths activated, a vault emerged.
The vault on Kadara is likely the key to starting the process that will heal the planet's environment. Explore the vault and determine a way to activate it.
Objectives[ | ]
- Activate monoliths (0/3)
- Investigate the vault's entrance
- Activate the vault's emergency power
- Remove the vault's lockdown
- Escape the purification field and exit the vault
The Outlaw Monolith[ | ]
Acquisition[ | ]
This mission is automatically acquired upon approaching a monolith. The monoliths can be approached in any order and there is no requirement to start with any of them first.
Walkthrough[ | ]
This walkthrough starts with the northern monolith as it is closest to Kadara Port.
Activate monoliths (0/3)[ | ]
Approach any of the monoliths and the The Outlaw Monolith sub-mission will be added. This mission will appear three times, once for each monolith. The first objective of this sub-mission will change based on the number of glyphs to scan.
The Outlaw Monolith (Northern)[ | ]
Approach the area with the northern monolith.

Northern Monolith

Scan for glyphs (0/3)[ | ]
There are three glyphs to scan at this monolith: the Adherence Glyph, the Entropy Glyph, and the Zero Glyph.
Once the glyphs are scanned, activate the Remnant Console and solve the remnant decryption puzzle.
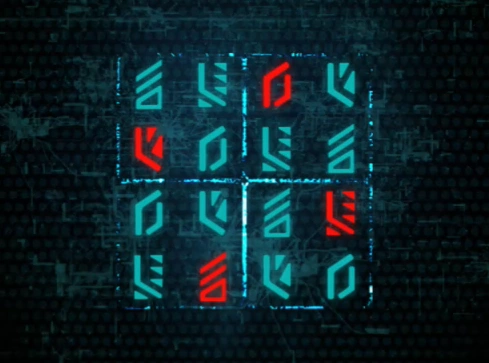
Remnant Decryption Puzzle Solution[ | ]

Northern Monolith

Activate the monolith[ | ]
Once the northern monolith is activated, subsequent monoliths can be activated, or Ryder can head to the vault site if this is the final monolith to be activated.
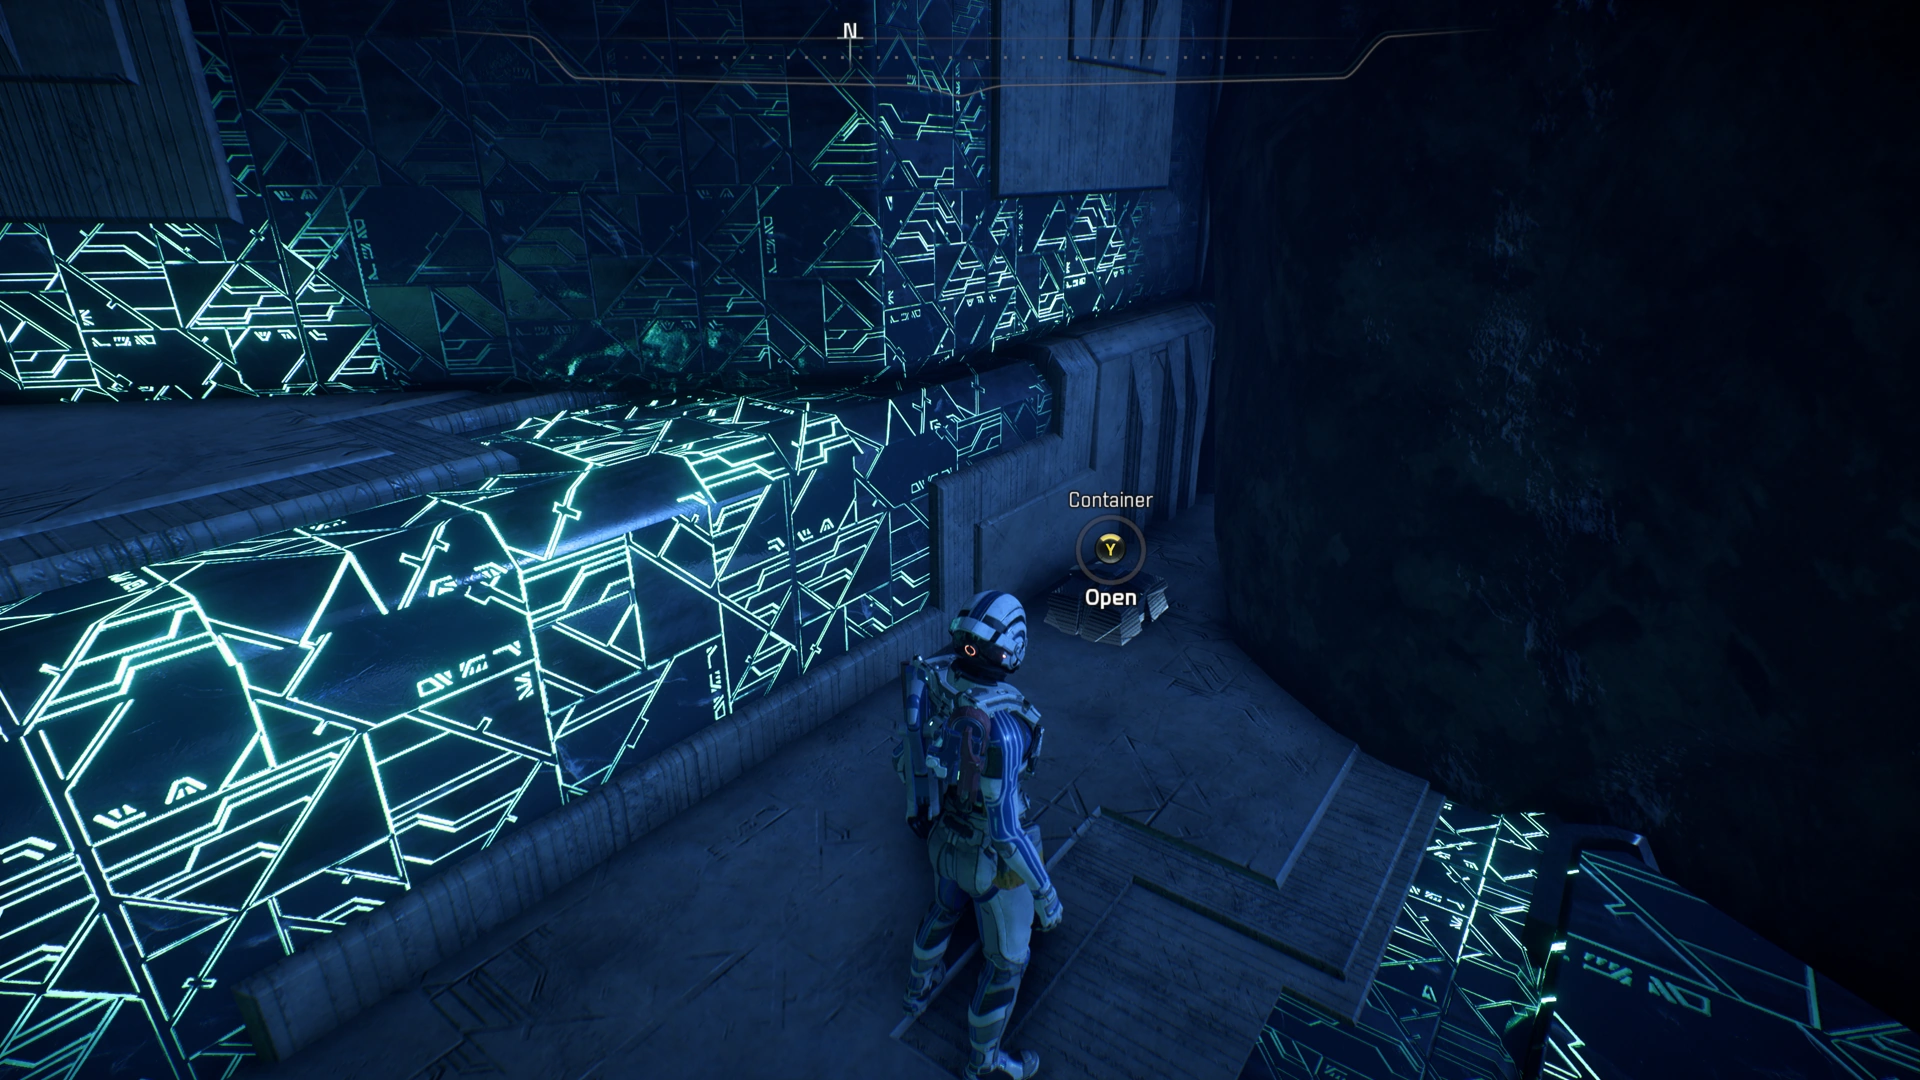
Before leaving the northern monolith, there are two containers that can be collected.

Container 1

Container 2


There is also an Adaptive Remnant Core Device that can be scanned for +100 Remnant RD.
The Outlaw Monolith (Western)[ | ]
Approach the canyon with a cave entrance to the western monolith.
Western Monolith Entrance

Scan for glyphs (0/2)[ | ]
Continue deeper into the cave and there are hostile enemies fighting friendly angara. Defeat the enemies.
After combat, Ryder can speak to the Local Angara who lead the friendly angara during combat. The conversation provides general information but nothing of value.
There are two glyphs to scan at this monolith: the Hydrodynamic Glyph and the Nihility Glyph.
Once the glyphs are scanned, activate the Remnant Console.
Activate the monolith[ | ]
Once the western monolith is activated, subsequent monoliths can be activated, or Ryder can head to the vault site if this is the final monolith to be activated.
Before leaving the western monolith, there is a container that can be collected.
Container 3

The Outlaw Monolith (Southern)[ | ]
Scan for glyphs (0/4)[ | ]
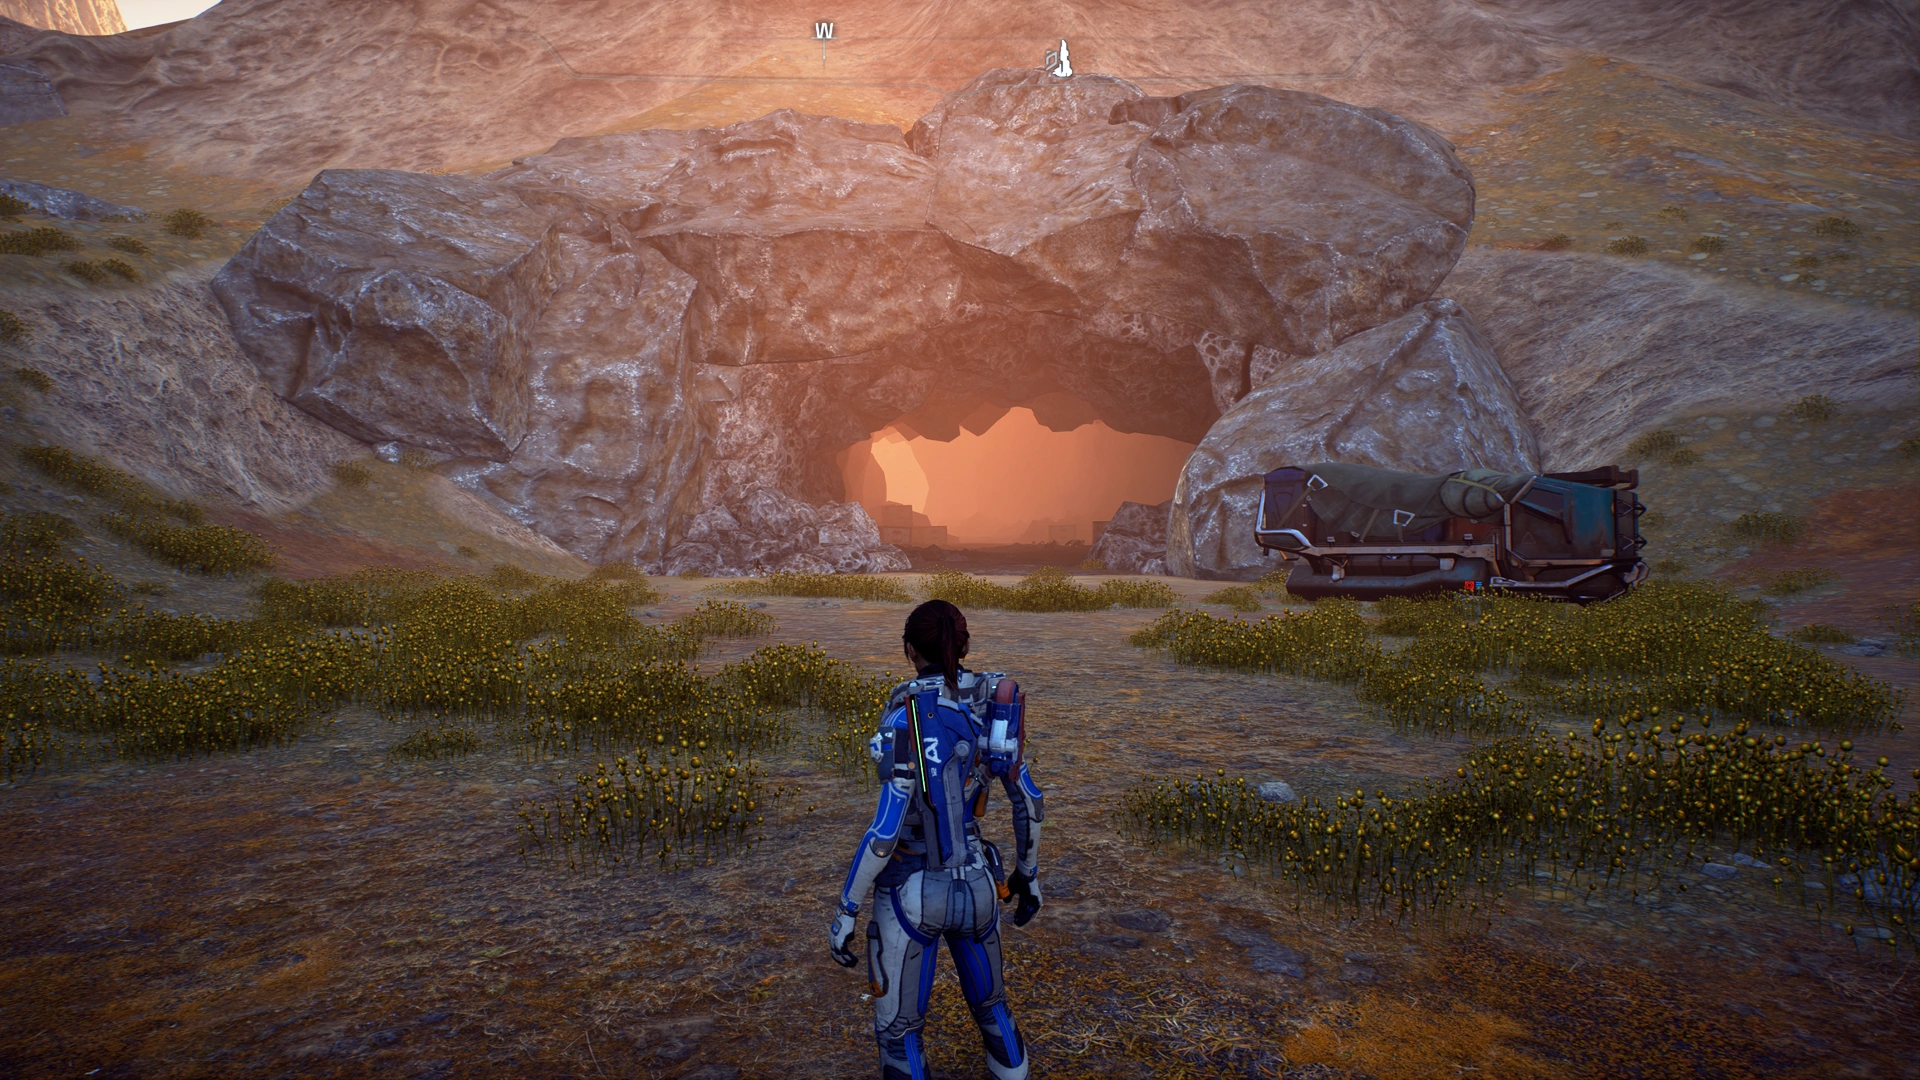
Approach the cave entrance for the southern monolith and head inside.
Southern Monolith Entrance
Inside the entrance of the cave are a number of destroyed Observers. These can be scanned for +10 Heleus RD but it can be tricky to get the scanner to correctly scan the Observers.
Continue deeper into the cave and there are hostile enemies including a Hydra. Defeat the enemies.
After combat, there are four glyphs to scan at this monolith: the Interval Glyph, the Kinetic Glyph, the Semiosis Glyph, and the Thermodynamic Glyph.
Once the glyphs are scanned, activate the Remnant Console.
Activate the monolith[ | ]
Once the southern monolith is activated, subsequent monoliths can be activated, or Ryder can head to the vault site if this is the final monolith to be activated.
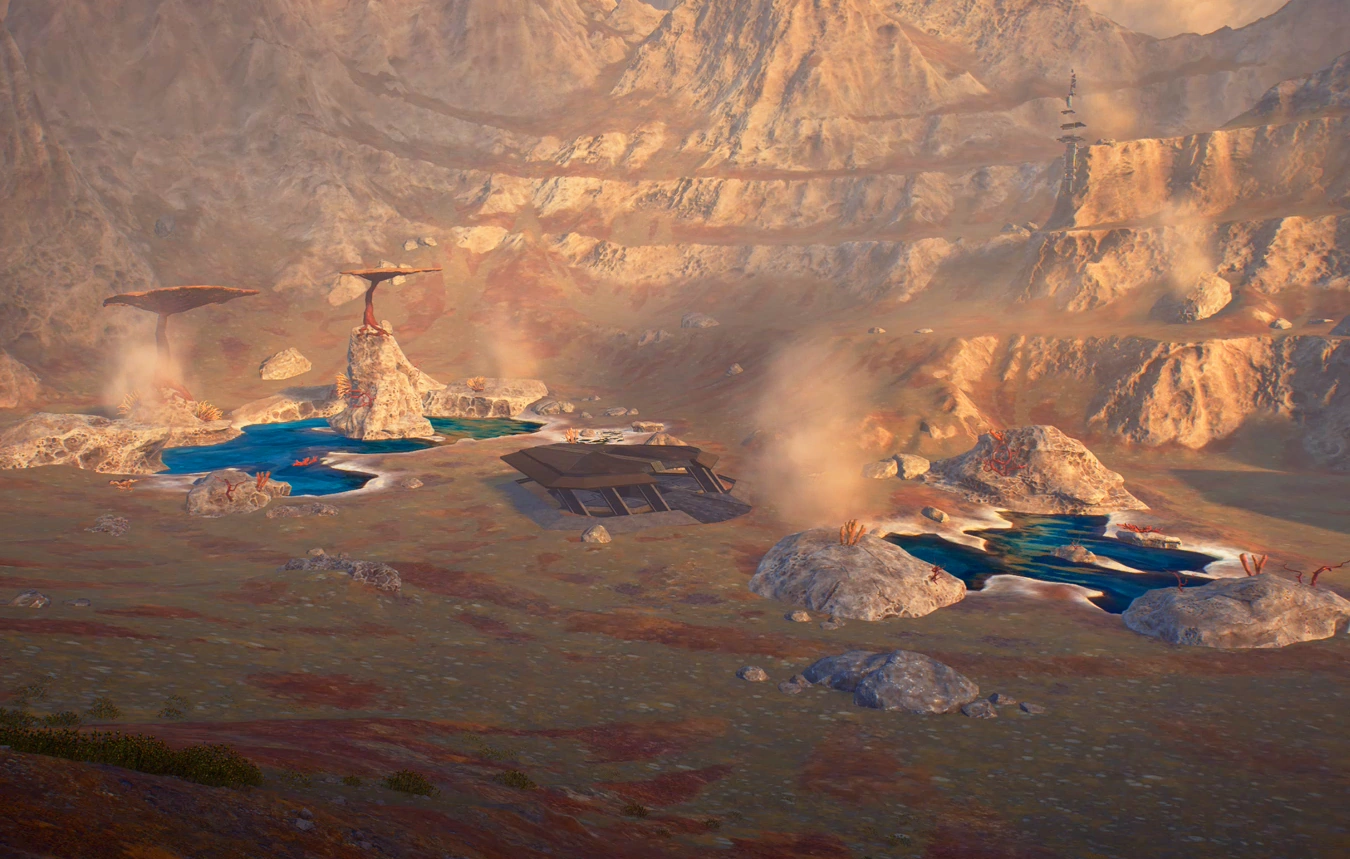
Before leaving the southern monolith area, head to the cave entrance. Look to the east and there is a landing platform with an elevated tower.
Landing Platform

SAM will comment about a battle taking place between two rival factions. The enemies are fighting each other and Ryder can pick off some of the enemies from a distance but eventually the enemies will focus on Ryder. The enemies also include another Hydra. Defeat the remaining enemies before exploring the area.
In this area, there are supply caches to restore ammo, health, and power cells. Restock as needed.
On the landing platform, there is an Adapted Initiative Core Tech to scan for +100 Milky Way RD.
The top of the nearby Observation Post can be scanned for +10 Milky Way RD.
There are two All Terrain Haulers nearby the platform that can be scanned and one will award +10 Milky Way RD (the other will turn light yellow).
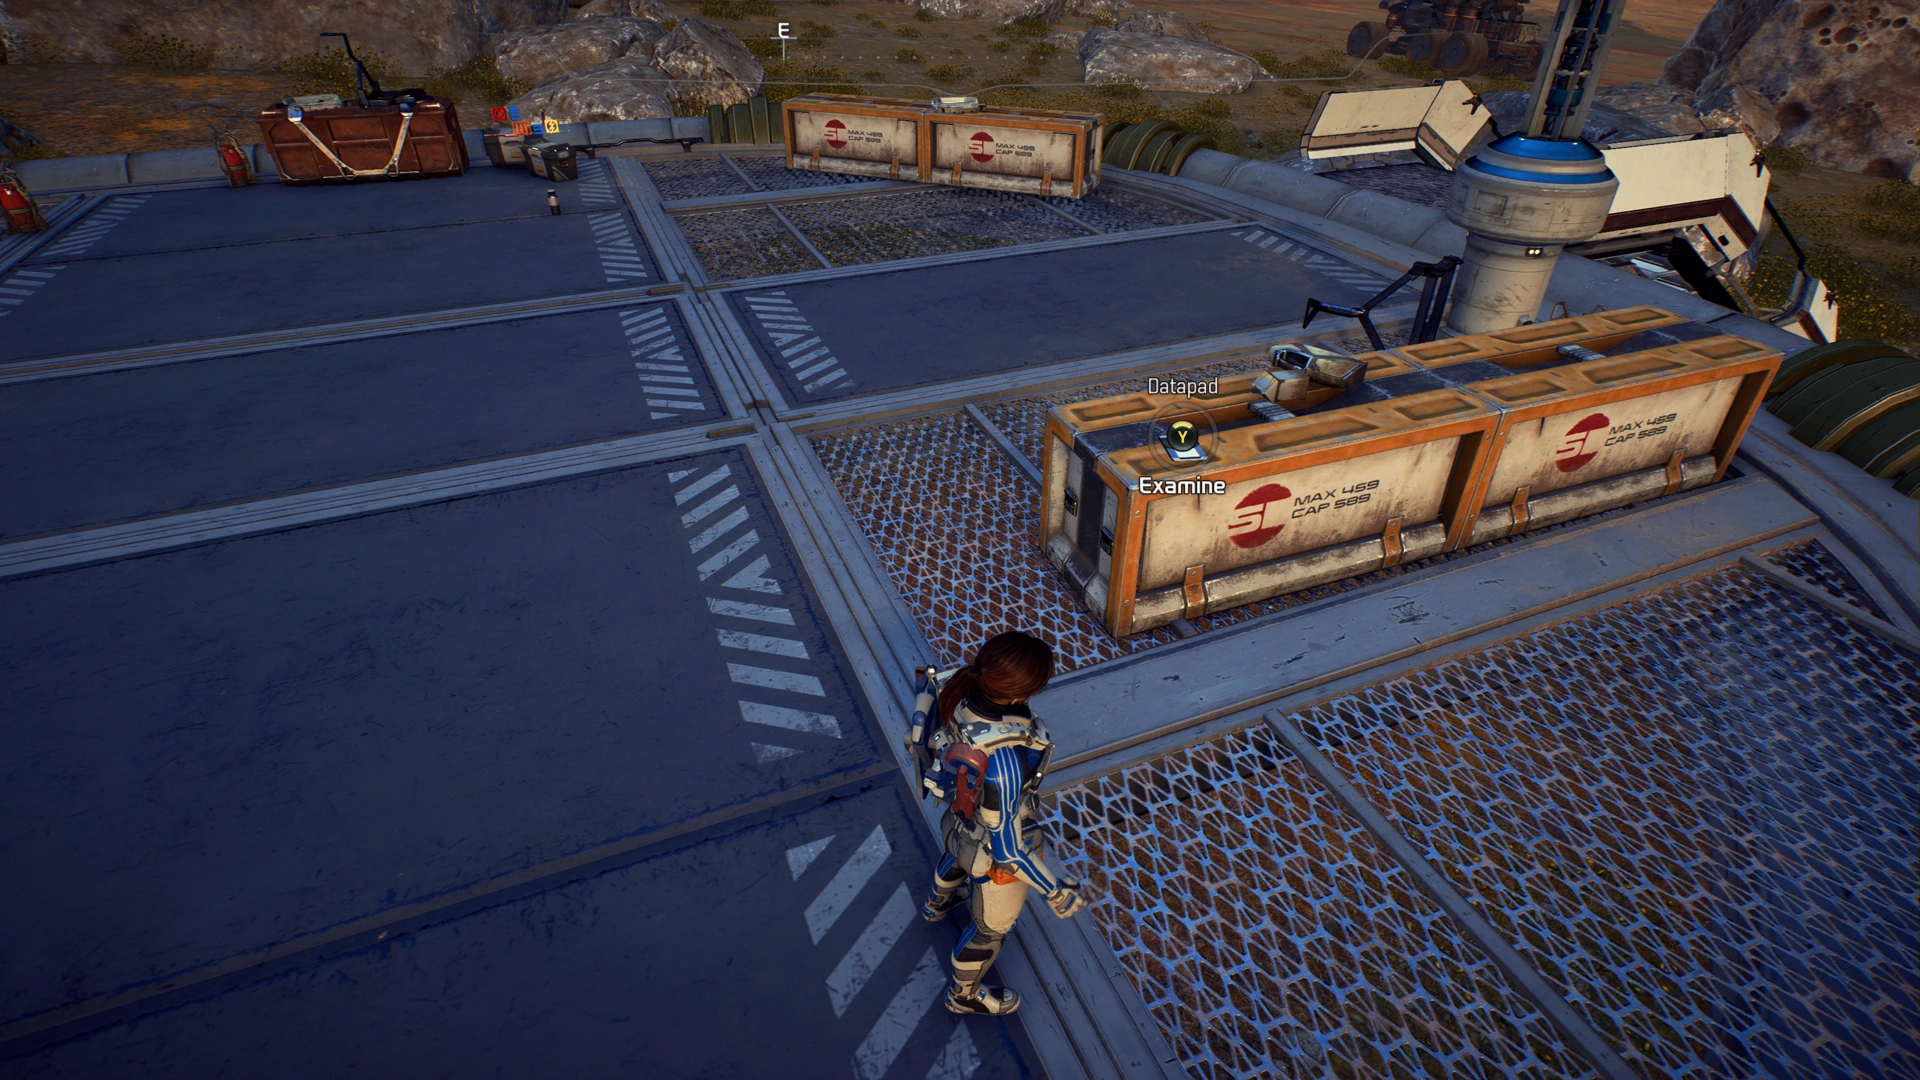
Personal Log: Davon can be found on a crate on the landing platform. This datapad can only be found after the enemies appear and fight each other.
Datapad
Investigate the vault's entrance[ | ]
After the third monolith is activated, the vault can be approached and will emerge from the ground.
The Vault

Head down the ramp to the vault and open the doorway leading to the Gravity Well.
Vault Entrance
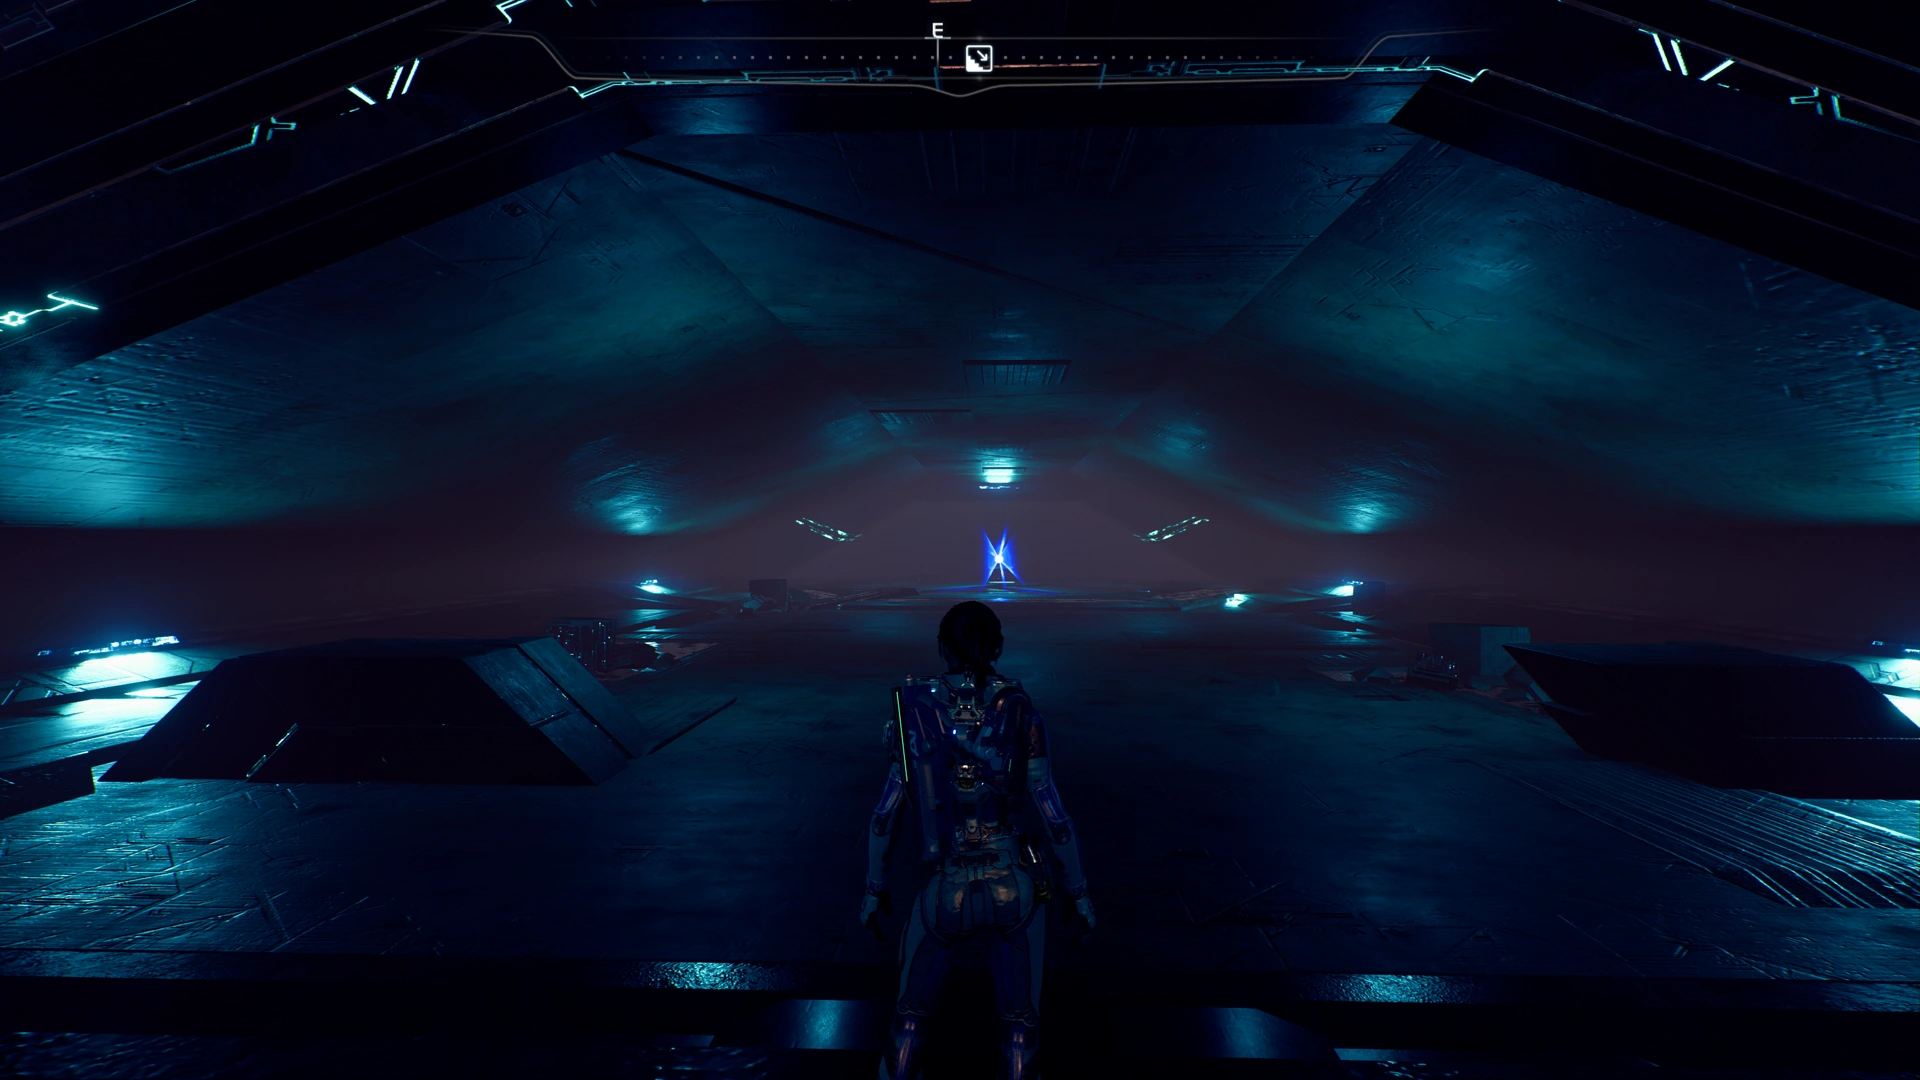
Use the Gravity Well to enter the vault.
Activate the vault's emergency power[ | ]


Walkthrough Map
Ryder will land in a large Gravity Well room with a locked door D1 to the east.
Gravity Well Room

Explore behind and underneath the raised western platform and there is an Adaptive Remnant Core Device (ARCD) that can be scanned for +100 Remnant RD.
After scanning the ARCD, the emergency power has to be restored. Activate the Power Console C1 to turn on emergency power.
Remove the vault's lockdown[ | ]
Turning on the power will raise from the floor three remnant consoles C2, C3, and C4 that are surrounded by Shield Chargers. These glowing shield bubbles are currently red and will damage Ryder when they are entered. Ryder will have to enter each bubble, interact with the remnant console, and it will sink into the floor. The shield bubble will also turn light blue indicating that the bubble is now recharging shields instead of damaging them.
Ryder can interact with the three consoles in any order but all three must be interacted with for door D1 to open.
Activate all three consoles to open door D1.
Head to the east through door D1 into a large hallway that opens into the vault.
Vault Hallway

As Ryder enters the hallway, there will be enemies patrolling that will need to be defeated before exploration can continue. Defeat the enemies.
After defeating the enemies, head east and there is a large hexagon platform surrounded by ferrofluid.
Hexagonal Platform

Before heading east, there is a very cleverly hidden ARCD to the south. Head south and look over the edge of the small remnant columns down into the ferrofluid to find the device spinning. Ryder will have to carefully jump down onto some hexagonal remnant columns to be able to scan the ARCD. This is quite dangerous as the ferrofluid is ![]() ELECTRICAL DISCHARGE - Hazard Level 4 and it is very easy to miss the platforms. Scan the Adaptive Remnant Core Device for +100 Remnant RD.
ELECTRICAL DISCHARGE - Hazard Level 4 and it is very easy to miss the platforms. Scan the Adaptive Remnant Core Device for +100 Remnant RD.
It is tricky to get back out of this area. Look north and jump up to grab the tops of the small columns where Ryder jumped down from. It looks like the jump isn't possible being too high up but Ryder will grab the edge and climb up. Trying to jump out to the east will only land Ryder right in the middle of the ferrofluid.
Jump up to the north return back to the area with the hexagonal platform.
Jump down to the hexagonal platform but be aware that on the ledges to the east there are a few remnant enemies that are patrolling. These enemies should leave Ryder alone but be ready just in case they do attack from a distance. On the hexagonal platform there is a supply cache to restore ammo and power cells. Restock as needed.
Nearby is a remnant console C5 that is important to understand as the function of this console changes the paths forward.
When C5 is activated, several things will happen:
- Remnant columns R1 will raise up creating a series of ledges up to the east or recede down leaving only a flat platform.
- Bridge B1 will activate or deactivate allowing a path across the ferrofluid.
- Door D2 will open or close allowing access to the rem-tech container.
- Remnant columns R2 and R3 will raise up out of the ferrofluid creating platforms or sink back down into the ferrofluid.
This console is important as there is either an easy path out of the vault or collecting the rem-tech. Ryder will have to set up the path out of the vault carefully to get the rem-tech as well as safely escaping the purification field.
At this point, leave the console alone and head to the east up the remnant columns onto the ledges to defeat the patrolling remnant enemies.
On the southern wall, there is an Adaptive Remnant Core Device (ARCD) that can be scanned for +100 Remnant RD.
Head to the east and jump up onto the ledges into a small dark area to find a container.
Container 4

Collect the items and then head back to the bridge B1. Head north over the bridge and then west to approach the open door D2. SAM will comment about rem-tech being behind a barrier and it can only be collected once the purification field has been activated. SAM will mark the location on the map. Also on this platform is another supply cache with ammo and power cells. Restock as needed.
At this point, Ryder can continue north to continue exploring but there will be areas that can't be accessed. It is better to backtrack at this point to set up the paths forward.
Head back to console C5 and activate the console. R1 will sink down, bridge B1 will deactivate, and door D2 will close. However, R2 and R3 will raise up out of the ferrofluid to the east. This will allow Ryder a path forward to continue preparing different paths.
Head east across the remnant column platforms R1, R2, and then onto R3.
Remnant Column Platforms

Look to the north and there are a series of elevated ledges with remnant enemies patrolling. Ryder will be heading north onto those ledges.
Northern Ledges

Jump onto remnant columns R6 and then northwest onto the ledges. Defeat the enemies on the ledges.
After combat, head around the upper ledge to the west and then to the north. Look up for the spinning lights and there is another cleverly hidden Adaptive Remnant Core Device (ARCD) that can be scanned for +100 Remnant RD.
Return back and activate console C6 to raise remnant columns R4 and R5 out of the ferrofluid. Ryder now has a path to the west that leads to the rem-tech hexagonal platform.
Western Areas

Jump west across the remnant columns platform R4 and continue west to the hexagonal platform. Head to the northwest to console C7.
Heading Northwest
Western Area


To the west there are patrolling remnant enemies but before heading into combat, it is important to understand this area and the options for combat.
- If Ryder activates console C7, the Remnant Blast Shields in the area providing cover will disappear and the central area will have a cluster of four Shield Charger bubbles in light blue recharge state appear. If Ryder activates the console C7 again, the bubbles will turn red causing damage even to enemies.
- There is a powered down Remnant Turret to the west and console C8 next to it. If Ryder runs to the west and activates C8, the turret will turn friendly and attack hostile enemies.
Ryder can choose to activate the consoles for help with the battle or just attack the enemies. Pick a strategy for combat and defeat the enemies.
After defeating the enemies, look to the southeast and high up on the wall hidden behind some remnant columns is a console C9. Jump up to the console and activate it to open door D3 to the northwest.
Jump down from the console and head back to the remnant columns platform R4. Jump north to platform R5 and then to the ledges to the north where door D3 is now open. Inside the small room is a container to collect.
Container 5

Return back to the center of the western area using R5 and then R4. There is a container to collect.
Container 6

After collecting the items, to the southwest is a series of ledges. Jump up and there is another container to collect.
Container 7

Jump down and head north to closed door D4.
Northern Doorway

Nearby is a supply cache with ammo and power cells. Resupply as needed. Head back to door D4 and prepare for combat. Open the door and there will be remnant enemies inside the hallway. Defeat the enemies.
After combat, head west around the corner deeper into the hallway.
Puzzle Hallway

There is a series of six consoles C10, C11, C12, C13, C14, C15 and a locked puzzle door D5.
Ryder can scan the floor to find yellow ferrofluid conduits but the door actually shows the puzzle solution of glowing glyphs that correspond with symbols over the consoles to interact with to unlock the door. The glyphs will partially appear and then disappear.
Puzzle Solution

The puzzle solution is ![]() Verdurous Glyph,
Verdurous Glyph, ![]() Undefined Glyph,
Undefined Glyph, ![]() Hydrodynamic Glyph,
Hydrodynamic Glyph, ![]() Undefined Glyph,
Undefined Glyph, ![]() Undefined Glyph, and
Undefined Glyph, and ![]() Magnitude Glyph.
Magnitude Glyph.
Ryder will have to interact with the six consoles in the correct order without making a mistake for the door to unlock. If Ryder does make a mistake, remnant enemies will be summoned and have to be defeated. Ryder will then have to start over and activate the six consoles again.
Activate C10, C11, C12, C13, C14 and then C15 unlocking the door D5. Open the door and head into the puzzle room.
Puzzle Room

Inside the puzzle room there are multiple items to interact with.
- Cleverly hidden on the ceiling are four data patterns that can be scanned but they do not award any RD.
- There are three Adaptive Remnant Core Devices that can be scanned for a total of +300 Remnant RD.
- There is a Remnant Data Core to collect for Task: Remnant Data Cores.
After interacting with all of the items, return back through door D5 then D4, and head back to the western area near console C8. Looking to the west there is another closed door at the top of a series of ledges.
Western Doorway

Jump west across the small chasm filled with ferrofluid and head north jumping up a ledge to find a small container.
Container 8
After collecting the items, there is another container to collect hidden behind remnant pillars high up on the wall to the south. Jump up onto the raised ledges to the west and then head south. Jump over to raised ledge where the container is hidden.
Container 9

On the wall next to the container, there is a Stratospheric Glyph that can be scanned but it doesn't award any RD. This glyph doesn't appear to serve any useful purpose. Unlike other vaults, this glyph doesn't go to the remnant decryption puzzle.
After collecting the items, jump over to the locked door D6. Activate console C16 to unlock the door. Before opening the door, there is a nearby supply cache with ammo and power cells. Resupply as needed as combat will be taking place in the next area.
Open the door into the next area and head inside but prepare for combat. There will be multiple remnant enemies including a Destroyer.
Western Hallway

It is important to understand the next area as there are several consoles that can help with combat.
- Console C17 will change the shield bubble that is currently damaging red into light blue shield recharging.
- Behind the large square column in the center of the room, there is a Remnant Turret that is hostile. Activating console C18 will turn the turret to friendly to attack the remnant enemies in the room. If Ryder destroys the turret, the console will sink into the floor and be unavailable to interact with. Even if Ryder changes the turret friendly, it is important to turn it back to hostile and destroy the turret to get all of the encounter XP for defeating the enemies in the room.
- There are two supply caches with ammo and power cells on opposite sides of the room to resupply during combat.
When Ryder is ready, pick a combat strategy and then head down the hallway into the western room to defeat the enemies.
After combat, jump up onto the top of the central square column to find console C19. Activate this console for a remnant decryption puzzle that when solved yields two skill points.
Remnant Decryption Puzzle Solution[ | ]
Vault Console
At this point, most of the vault has been explored except for activating the purification field. Leave the western room and head back to the remnant columns platform R4 and jump east across to the ledges. Jump southeast onto remnant columns platform R6 and then back west across platforms R3, R2, R1 to the hexagonal platform with console C5.
It isn't clear yet, but to acquire the rem-tech behind door D2, Ryder will have to prepare the escape path ahead of time allowing the door to be open. Activate C5 and R1 will rise up out of the ferrofluid making a set of ledges up to bridge B1. Door D2 will open but the remnant column platforms R2 and R3 will sink back down into the ferrofluid. Unlike the previous exploration, this time R4 is already raised up out of the ferrofluid so there is a path to the northern ledges and then down onto the remnant columns platform R6.
Jump up R1, run across B1, jump across to R4, jump across to the northern ledges, and then jump down onto R6. Looking to the east, the door D7 is currently locked. Jump east over to the ramps and then look to the south. Up on the southern wall, there is another Adaptive Remnant Core Device that can be scanned for +100 Remnant RD. Scan the spinning device and then turn around to find console C20.
It is important to note that this is the last chance to easily get any of the items in the rest of the vault. If any items have been missed, collect them now. When Ryder is ready, activate console C20. This will cause the remnant columns platform R6 to sink down into the ferrofluid but the door D7 will open.
Eastern Doorway

Head through the now open doorway into the large purification room.
Purification Room

Inside the purification room, the purification console C26 is currently locked down. Ryder will have to activate the remaining five consoles C21, C22, C23, C24, and C25 in the room to power up the console. Each of the five consoles is currently inside of a shield bubble that is red and damaging. Activating the console will change the bubble over to light blue shield recharging.
However, before doing anything, there are a few items of note about these consoles to know before starting the power up sequence:
- Each of the consoles when activated will spawn a few remnant enemies. It's not required to defeat them before moving to the next console, but it makes it much easier to take the enemies on one console at a time.
- Interestingly, if Console C21 is activated as the first console, no enemies will spawn for that console. The other four will spawn enemies as normal. This cuts down on the required combat. If Ryder starts with any other console first, then C21 will spawn enemies no matter when it is activated.
- When the first console is activated, the door D7 will lock and Ryder is trapped in the room. Ryder will have to complete the process before the door will open again.
Before starting the power up sequence, there is a single container to collect.
Container 10

There are multiple supply caches staged around the area to resupply ammo and power cells. Familiarize with the locations and then head to console C21.
Activate C21 and the shield bubble will change to light blue. Any of the remaining consoles can be activated in any order but it's easiest to start on one side of the room and go around activating the consoles in order. Head to console C22 and activate it. Enemies will spawn. Defeat them. Move on to console C23 and repeat the activation process. Additional enemies will spawn. Defeat them. Resupply ammo and power cells as needed.
Move on to consoles C24 and C25 repeating the process. Once this is done, the console C26 will power up and be ready for activation. Door D7 will have opened again.
However, BEFORE interacting with the purification console and starting the purification field, it is important to plan the path out of the vault. Take the time to familiarize with the map and the path out of the vault. Go over the next section before activating the field so that the escape route makes sense without the pressure of the purification field bearing down.
When Ryder is prepared and ready, activate console C26.
Escape the purification field and exit the vault[ | ]
The purification field will start and Ryder will be awarded the ![]() Fusion Mod of Rapid Deployment.
Fusion Mod of Rapid Deployment.
When the purification field is activated, all of the shield bubbles in the room will turn back to damaging red. Time will be very short and Ryder will have to run to successfully get the rem-tech container and get out alive.
Time To Escape!

Run up the ramp out of the purification room and jump south to console C20 to raise the remnant columns platform R6 out of the ferrofluid. Ryder can then jump onto R6 and then jump northwest to the northern ledges.
Northern Ledges Escape

Ryder can then turn east and jump across remnant columns platform R4 and then jump onto the hexagonal platform with the door D2.
Columns Platform Escape

Head to the now opened doorway into the rem-tech room.
Rem-Tech Doorway

Head inside the now opened small room and collect the rem-tech.
Container 11

After collecting the rem-tech, run out of the room, head south over bridge B1, and then jump west to the hexagonal platform where console C5 is located.
Hexagonal Platform Escape

Ryder can then jump west to the ramps heading towards the Gravity Well room.
Western Ramps Escape

Run west into the Gravity Well room to console C27 and activate it to turn off the purification field.
Gravity Well Escape

Once the purification field is turned off, the mission will complete and the final rewards are given.
Water sources on Kadara will no longer cause ![]() TOXIC ENVIRONMENT damage when entered.
TOXIC ENVIRONMENT damage when entered.
Ryder can then exit the vault using the Gravity Well.